Well, first of all, as you can see I am not good naming my post haha but I guess you can figure out what this post is about.
A few days ago, some colleagues and I decided to start a little project just for fun and I was in charge of installing a MongoDB server where we could store some data for a later use. So here is what I found. (I’ll skip the part where you create an AWS instance. Let’s leave that for another occasion).
Adding the MongoDB repository
First, connect to your amazon instance via ssh. Then you have to import the public key used by the package management system.
sudo apt-key adv --keyserver hkp://keyserver.ubuntu.com:80 --recv 2930ADAE8CAF5059EE73BB4B58712A2291FA4AD5
After importing the key, you will see something like this:
gpg: Total number processed: 1
gpg:               imported: 1  (RSA: 1)
Then we have to create a list file for MongoDB.
echo "deb [ arch=amd64,arm64 ] https://repo.mongodb.org/apt/ubuntu xenial/mongodb-org/3.6 multiverse" | sudo tee /etc/apt/sources.list.d/mongodb-org-3.6.list
Now we need to reload the local package database.
sudo apt-get update
Installing the MongoDB packages
You don’t need to be a guru genius Ubuntu hacker to know what the next step is. This command will install several packages which include the latest stable version of MongoDB along with helpful management tools for the MongoDB server.
sudo apt-get install -y mongodb-org
Next, start MongoDB with systemctl.
sudo systemctl start mongod
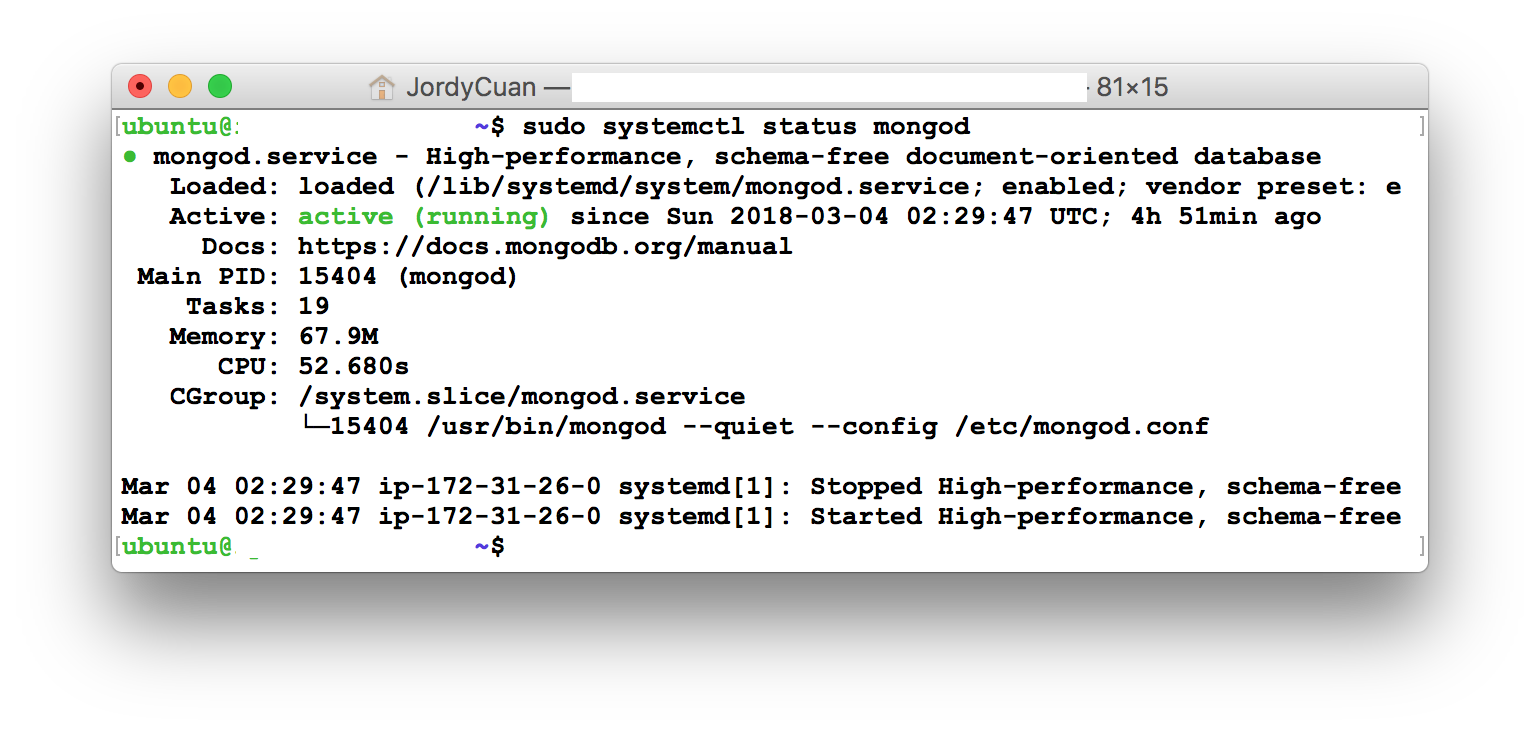
You can also see check the service status by typing
sudo systemctl status mongod
And you will get something like this
One step more that I sugest is to enable MongoDB to automatically start when the system starts.
sudo systemctl enable mongod
Now you’re able to access your MongoDB by typing the command mongod. Now let’s create a secure connection so that we can access it remotely, it’s more fun that way.
You can find the complete documentation to install MongoDB here.
Securing MongoDB
Adding a root/administrative user
To add our user, we’ll connect to the Mongo shell:
$ mongo
The output would be something like the one above warning us that access control is not enabled for the database and that read/write access to data and configuration is unrestricted.
2018-03-03T19:10:42.446+0000 I STORAGE  [initandlisten]
2018-03-03T19:10:42.446+0000 I STORAGE  [initandlisten] ** WARNING: Using the XFS filesystem is strongly recommended with the WiredTiger storage engine
2018-03-03T19:10:42.446+0000 I STORAGE  [initandlisten] **          See http://dochub.mongodb.org/core/prodnotes-filesystem
2018-03-03T19:10:42.534+0000 I CONTROL  [initandlisten]
2018-03-03T19:10:42.534+0000 I CONTROL  [initandlisten] ** WARNING: Access control is not enabled for the database.
2018-03-03T19:10:42.534+0000 I CONTROL  [initandlisten] **          Read and write access to data and configuration is unrestricted.
2018-03-03T19:10:42.534+0000 I CONTROL  [initandlisten]
You can play with lots of things here but let’s focus. We want to create an administrative user. The database admin designates where the credentials are stored.
NOTE: The privilege level comes from the assignment of the role. For a complete list of roles you can check this.
> use admin
> db.createUser(
>   {
>     user: "YOUR_USER",
>     pwd: "SECRET_PASSWORD",
>     roles: [ { role: "userAdminAnyDatabase", db: "admin" } ]
>   }
> )
You can take this moment to give some super powers to your coworkers.
> use dummy_coworkers_db
> db.createUser(
>   {
>     user: "YOUR_PARTNER_USER",
>     pwd: "SECRET_PASSWORD",
>     roles: [ { role: "readWrite", db: "dummy_coworkers_db" } ]
>   }
> )
Important: When you try to connect remotely you have to indicate which db you want. If you are an admin but you just have roles on admin db you should connect to this one. You won’t be able to connect to dummy_coworkers_db but you can set this role to you later.
If you did something wrong you can updateUser.
MongoDB conf file
To enable auth and open MongoDB access up to all IPs you have to edit your MongoDB config file. On Ubuntu:
sudo vim /etc/mongod.conf
Look for the net line and comment out the bindIp line under it, which is currently limiting MongoDB connections to 127.0.0.1.
WARNING: Do not comment out the bindIp line without enabling authorization. Otherwise you will be opening up the whole internet to have full admin access to all mongo databases on your MongoDB server!
Also I suggest to change the default port. It is a good practice.
# network interfaces
net:
#  port: 27017 <- OLD PORT
  port: 7654 # <- NEW PORT
#  bindIp: 127.0.0.1  <- comment out this line
Scroll down to the #security: section and add the following line. Make sure to un-comment the security: line.
security:
  authorization: 'enabled'
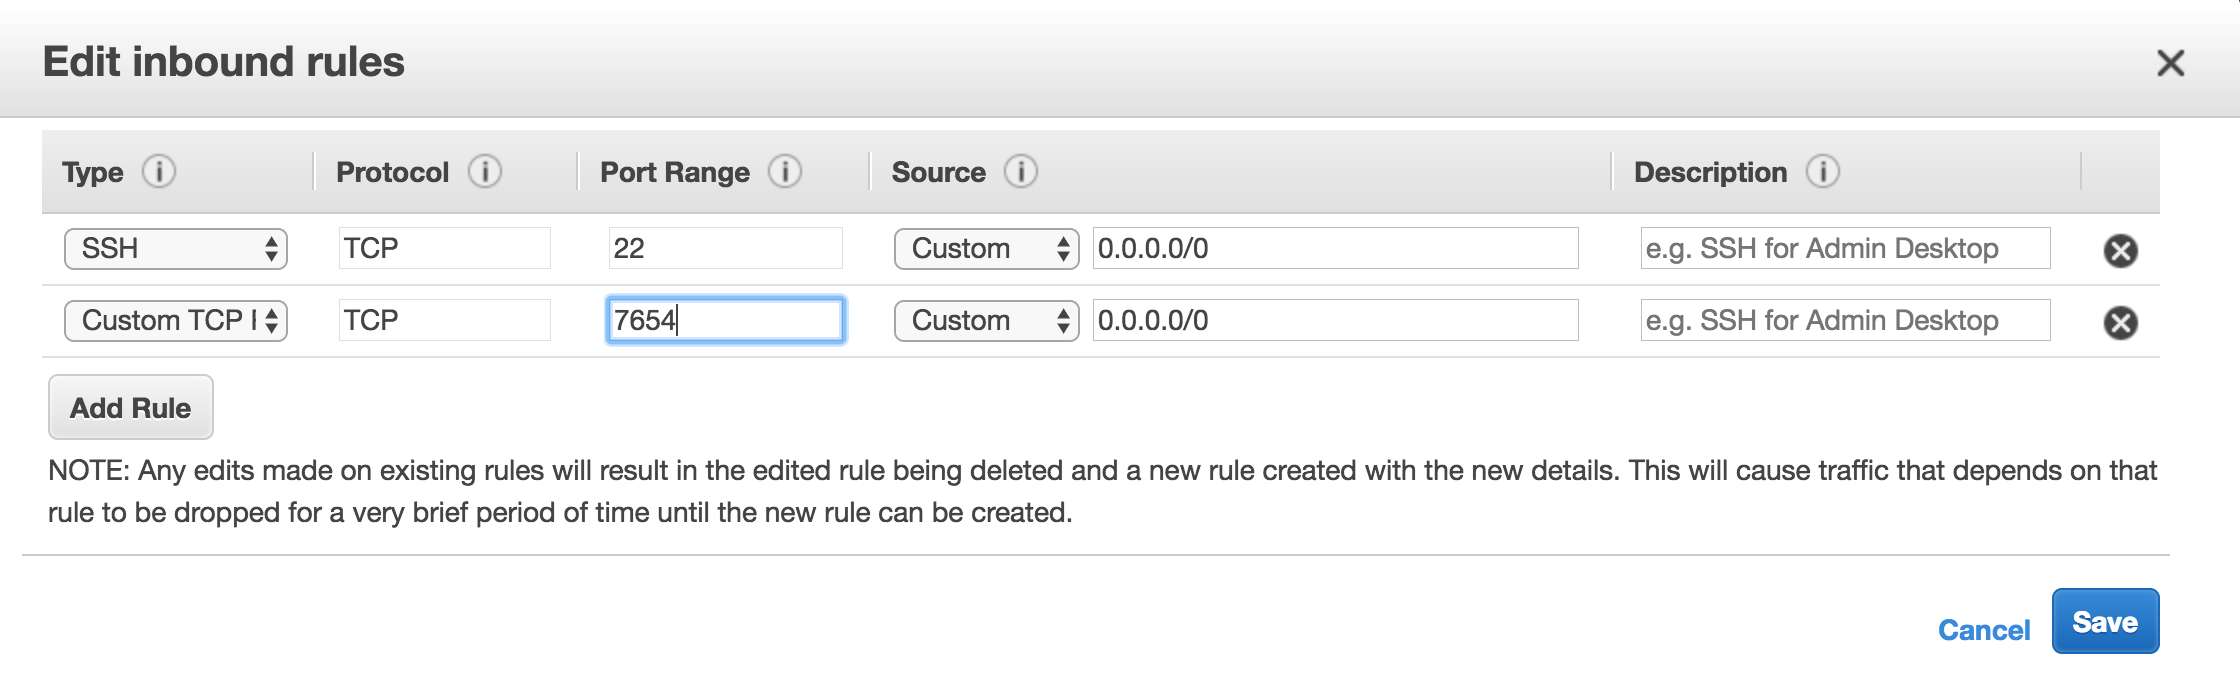
Open the chosen port on your EC2 instance
- Go to your EC2 dashboard: https://console.aws.amazon.com/ec2/
- Go to
Instancesand scroll down to see your instance’s Security Groups. Eg, it will be something likelaunch-wizard-1 - Go to
Netword & Security->Security Groups->Inboundtab ->Editbutton. - Make a new Custom TCP with the port you chose (eg. 27017), Source: Anywhere, 0.0.0.0/0
Last, restart mongo daemon (mongod)
sudo service mongod restart
Connecting using mongo shell as client
Use your local console to enter the remote Mongo database we just set up, you can use the mongo shell:
$ mongo -u YOUR_USER -p SECRET_PASSWORD 123.45.67.89/db_name
123.45.67.89 is your server’s public IP address.
Connecting using pymongo python library as client
import pymongo

client = pymongo.MongoClient("mongodb://YOUR_USER:SECRET_PASSWORD@123.45.67.89:7654/db_name") # 7654 is the port we have defined before

db = client.db_name

print db.simple_collection.count()
Also a good tool to connect to our servers is Studio 3T app
Dudas / Comentarios
Si tienes alguna duda o comentario, escríbelo aquí o mandame un tweet a @JordyCRPetrucci y te ayudaré con gusto.